🔧 Step-by-Step Answer Walkthrough For Easy Level
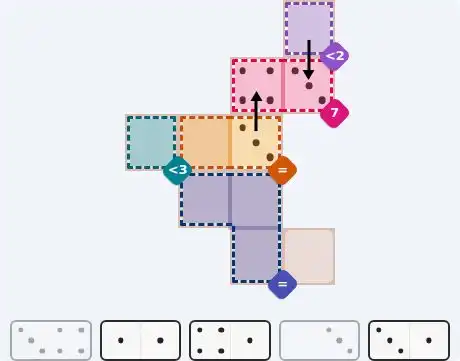
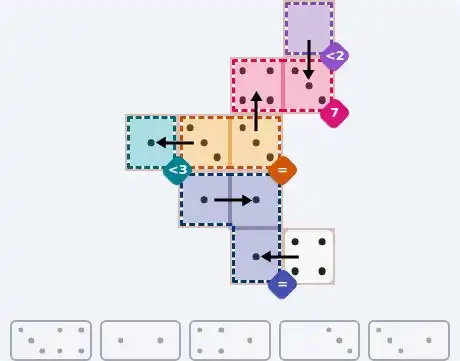
The purple less-2 cell sits alone in the top-right corner, and its only neighbour is the right-hand cell of the pink sum-7 pair, so one vertical tile has to serve both. The capped cell accepts 0 or 1 — but a 1 there would leave the pink pair needing a 6 to reach 7, and no domino in the tray carries a 6. So the 0/3 tile goes in standing vertically: 0 in the upper half inside the purple cell, 3 in the lower half inside the pink pair.
With 3 already in the pink pair's right-hand cell, the left-hand cell must be 4. The 3/4 tile stands vertically to supply it — 4 in the upper half inside the pink region, 3 in the lower half, which lands in the right-hand cell of the orange equals pair. The top-right corner is now fully accounted for.
Orange's equals pair already holds 3 on the right, so its left cell must also be 3. The 3/1 tile lies flat to do it: 3 on the right inside the orange pair, 1 on the left in the teal less-3 cell on the left edge, comfortably under its cap. One domino fixes both the centre of the board and the far left side.
Blue's equals block is three cells in an L along the bottom. The 1/1 double lies flat across its two top cells, so the third cell — the lower-right one — must also read 1. Only the 4/1 tile is left in the tray, so its 1 goes into that cell and its 4 into the uncoloured free square at the bottom-right corner. Nothing is left over and no cap is broken, which is the check that the block is right.
🔧 Step-by-Step Answer Walkthrough For Medium Level
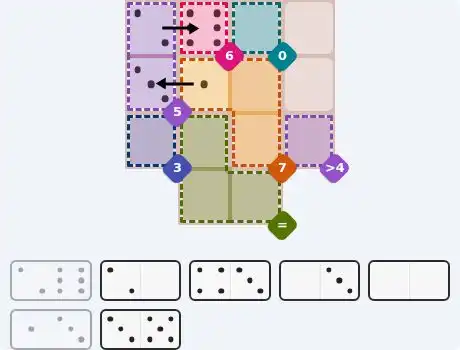
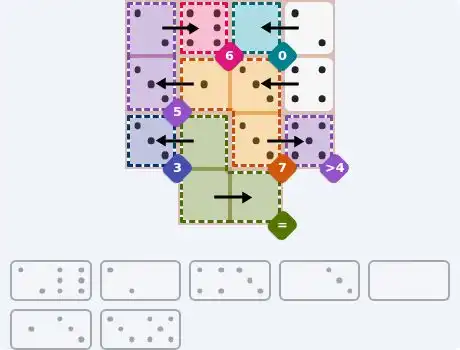
A single-cell sum has nowhere to hide: the pink sum-6 cell must hold 6. The tray contains exactly one 6, on the 2/6 tile, so that tile lies flat across the top row — 6 on the right inside the pink cell, 2 on the left at the top of the purple sum-5 column.
The purple sum-5 column now has 2 in its upper cell, so its lower cell is worth 3. The 1/3 tile lies flat to supply it: 3 on the left inside the purple column, 1 on the right in the top-left cell of the orange sum-7 block. Two separate regions get their first number from one domino.
The teal sum-0 cell can only be 0, so the 2/0 tile lies flat in the top row — 0 on the left inside the teal cell, 2 on the right in the free square at the top-right. That also pins the top row completely: three of its four cells are settled and none of them interferes with the capped cells below.
The blue sum-3 cell on the left edge names 3, and the 0/3 tile lies flat to place it — 3 on the left inside the blue cell, 0 on the right in the top-left cell of the green equals block. Because the block must match, all three of its cells read 0, and the 0/0 double lies flat across the two bottom cells to complete it.
Orange's sum-7 block already carries 1 in its top-left cell, so the other two cells owe 6 between them. The 3/5 tile fits with 3 in the block's bottom-right cell and 5 out to the right in the purple greater-4 cell, which that cap allows. That leaves 3 for the block's top-right cell, supplied by the 4/3 tile with its 4 going out to the second free square. Total: 1 + 3 + 3 = 7, and every domino is used.
🔧 Step-by-Step Answer Walkthrough For Hard Level
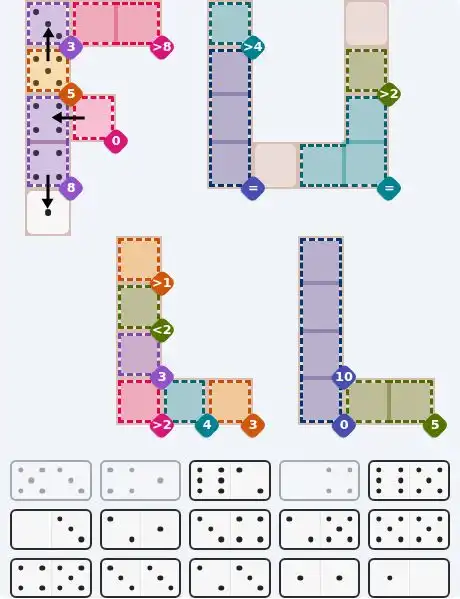
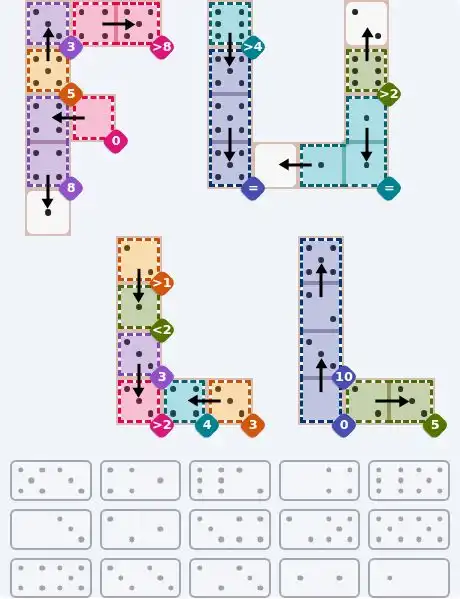
The orange sum-5 cell on the left, one row down from the top edge, is a single-cell sum, so it holds 5. Its natural partner is the purple sum-3 cell directly above it, and the 5/3 tile fits the pair exactly: 5 in the lower half inside the orange cell, 3 in the upper half inside the purple cell. The corner is settled before any equals region is touched.
The pink sum-0 single cell can only hold 0. The 0/4 tile lies flat in that row — 0 on the right inside the pink cell, 4 on the left in the top cell of the purple sum-8 pair — so the pair's lower cell must also be 4. The 4/1 tile stands vertically to provide it: 4 in the upper half inside the column, 1 in the lower half in the free square on the left edge.
The teal greater-4 cell sits directly above the top of the three-cell blue equals column, so a single vertical tile spans them. Put the 6/5 in with 6 up inside the teal cell and 5 down in the column's upper cell: taking the 5 upward instead would demand three matching 6s, and the tray does not own that many. The column's remaining two cells must be 5 as well, and the 5/5 double stands vertically to fill them.
The green greater-2 cell in the right-hand column takes the last 6 in the tray, from the 6/2 tile, with 2 sent up into the free square at the top-right corner. Lower down that same side, the teal equals block is three cells in an L and fills entirely with 1s: the 1/1 double stands vertically across its two right-hand cells, and the 1/0 tile lies flat to put 1 in the left arm and 0 in the free square at the centre of the board.
The blue sum-0 cell at the bottom of the right-hand side can only be 0, so the 0/3 tile stands vertically — 0 in the lower half inside that cell, 3 in the upper half in the lowest cell of the blue sum-10 column. That column still needs 7 across two cells; the 2/5 tile stands vertically to give 5 in the upper cell and 2 in the middle one, and 5 + 2 + 3 lands exactly on 10.
The rest falls to elimination. The 2/1 tile stands vertically: 2 up in the orange greater-1 cell, 1 down in the green less-2 cell. The 3/3 double stands vertically with 3 up in the purple sum-3 cell and 3 down in the pink greater-2 cell. The 3/4 tile lies flat along the bottom, 4 on the left in the teal sum-4 cell and 3 on the right in the orange sum-3 cell. The 2/3 tile lies flat in the green sum-5 pair at the bottom-right corner, 2 on the left and 3 on the right. Finally the 4/5 tile lies flat along the top in the pink greater-8 pair, 4 on the left and 5 on the right.
💬 Community Discussion
Leave your comment