🔧 Step-by-Step Answer Walkthrough For Easy Level
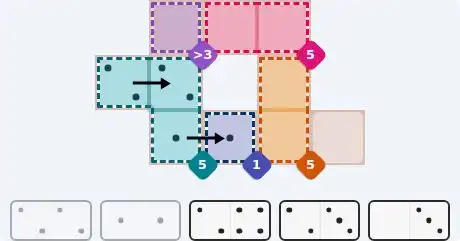
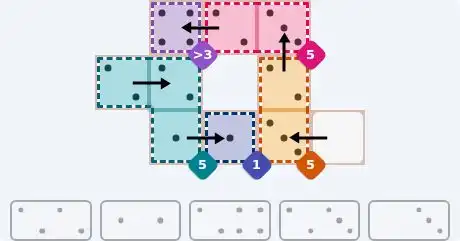
The region at [2,2] must sum to 1, so it contains a 1. The only way to place a 1 here is with the [1,1] domino, which must occupy [2,2] and its only adjacent cell, [2,1]. Place [1,1] horizontally: [2,1]=1, [2,2]=1.
The sum‑5 region at [1,0], [1,1], [2,1] now has a known 1 at [2,1]. The remaining two cells must sum to 4 — the [2,2] domino (two 2s) fits vertically: [1,0]=2, [1,1]=2.
The top sum‑5 ([0,2],[0,3]) and the right sum‑5 ([1,3],[2,3]) share column 3. The [2,3] domino provides 2 and 3. Place it vertically: [1,3]=2, [0,3]=3. Both sums are now satisfied.
The only uncovered cells are [2,3] and [2,4]. The [0,3] domino completes the grid horizontally: [2,3]=3, [2,4]=0. The empty cell at [2,4] accepts 0 without issue.
🔧 Step-by-Step Answer Walkthrough For Medium Level
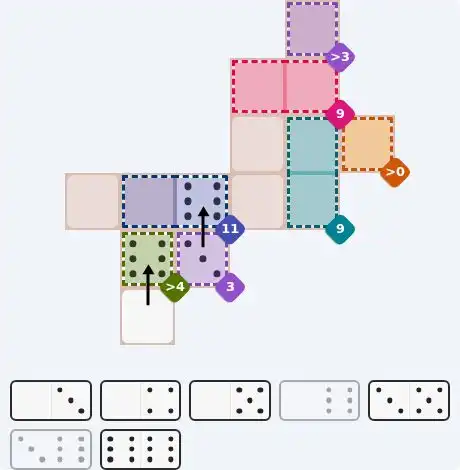
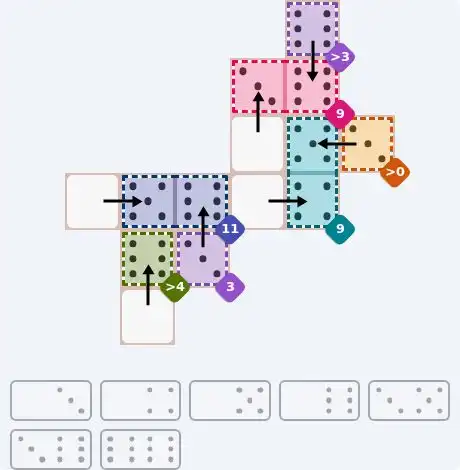
Cell [4,1] requires a number >4. The only such digit in the domino set is 6, carried by the [0,6] domino. Place [0,6] vertically: [4,1]=6, [5,1]=0 (the empty cell at [5,1] takes the 0).
The sum‑3 cell at [4,2] must be exactly 3. The neighboring cell [3,2] is part of a sum‑11 region with [3,1]. To pair 3 with a digit that can sum to 11 with its partner, [3,2] must be 6. Use the [3,6] domino vertically: [4,2]=3, [3,2]=6.
Now [3,1] must be 5. The only domino offering a 5 with an available companion is [0,5]. Place it horizontally: [3,0]=0 (empty), [3,1]=5. The sum‑11 is satisfied.
The empty cell [3,3] will hold a 0. Pair it with a 4 to start the sum‑9 at [2,4]‑[3,4]. The [0,4] domino fits vertically: [3,3]=0, [3,4]=4. Then [2,4] needs 5 to reach 9; the [3,5] domino covers that: [2,4]=5, [2,5]=3 (the greater‑0 cell at [2,5] welcomes 3).
The sum‑9 at [1,3]‑[1,4] requires 3 and 6. The [0,3] domino supplies 0 and 3: place it with 0 at [2,3] (empty) and 3 at [1,3]. Finally, the [6,6] domino places 6 at both [0,4] (greater‑3) and [1,4] to complete the puzzle.
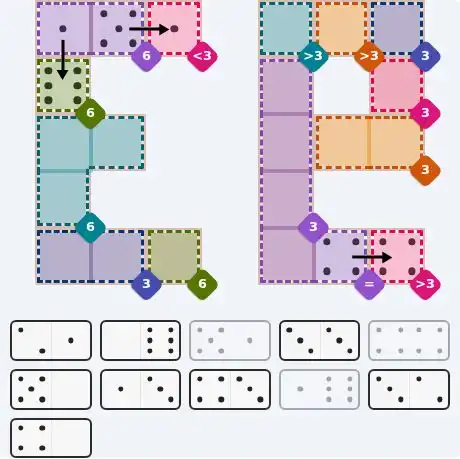
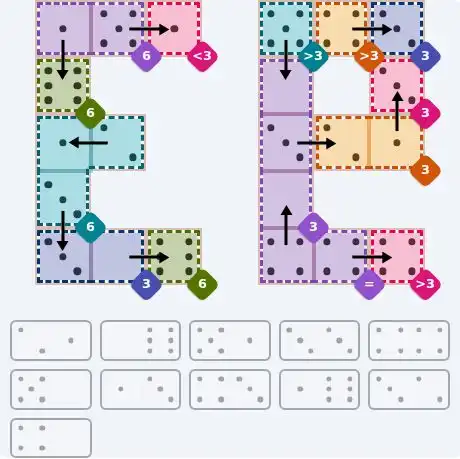
🔧 Step-by-Step Answer Walkthrough For Hard Level
The cell [0,2] is less than 3, so it must be 1 (0 is possible but would block the sum‑6). The sum‑6 at [0,0]‑[0,1] then requires 5 and 1. Place the [5,1] domino horizontally: [0,1]=5, [0,2]=1. Now [0,0] is forced to 1, making the sum‑6 cell [1,0]=6. The [1,6] domino covers both: [0,0]=1, [1,0]=6 vertically.
The sum‑3 at [0,6] must be 3. With greater‑3 cells to its left, the [4,3] domino (4 and 3) fits: place it horizontally at [0,5]=4, [0,6]=3. The remaining greater‑3 cell [0,4] gets 5 from the [5,0] domino, whose 0 lands in [1,4] to start the column’s sum‑3 chain: [0,4]=5, [1,4]=0.
The sum‑3 region covering [1,4], [2,4], [3,4] now has a 0 at the top. The remaining 3 must be split between [2,4] and [3,4]. The [3,2] domino (3,2) can occupy [2,4] and [2,5] to satisfy both the column and the sum‑3 at [2,5]‑[2,6]: [2,4]=3, [2,5]=2. Then [2,6] becomes 1, and the sum‑3 cell at [1,6] gets its 3 from the [1,3] domino vertically: [2,6]=1, [1,6]=3.
The sum‑3 region at [4,0]‑[4,1] interacts with the sum‑6 cell [4,2] and the already‑known [4,1] from earlier steps. Place the [0,6] domino horizontally: [4,1]=0, [4,2]=6. Then [4,0] needs a 3 to sum to 3 with [4,1]=0. The [3,3] domino covers this and the sum‑6 across [2,0]‑[2,1]‑[3,0]: place [3,3] vertically at [3,0]=3, [4,0]=3.
The sum‑6 on [2,0]‑[2,1]‑[3,0] now has two 3s, so [2,0] and [2,1] must sum to 0? Wait: the region sum is 6, so with [3,0]=3, the remaining 3 goes to [2,0]+[2,1]. The [2,1] domino (2,1) fits horizontally: [2,0]=1, [2,1]=2. Finally, the equals pair: [4,4]‑[4,5] need 4s. The [4,4] domino handles [4,5]=4, [4,6]=4 (greater‑3), and the [4,0] domino places 4 at [4,4] with 0 at [3,4] to close the sum‑3 column.
💬 Community Discussion
Leave your comment